Monday, December 26, 2011

Balloon Mead (Light)

This is my favorite of my mead recipes, now in an easy balloon wine version! It involves one more step than the other recipes, which is boiling.
Click here to see all balloon wine recipes!

Recipe:

2.2 lbs. Honey
water to 1 gallon
yeast

Put honey and water in a stock pot. Bring to a boil. Let simmer for five minutes. Let it cool. Place the mixture in your container. Making sure everything is at room temperature, add your yeast. Put a balloon with some pinholes in it over the container. Ferment.

Fermentation might take up to 30 days, but the balloon mead should clear very fast.

Bottle. Enjoy!


Tips:
1.) Try using pasteur champagne yeast for great results.
2.) During the boil you can throw in a sachet of black tea to add tannins for more body, but not necessary.

Monday, December 19, 2011

White Balloon Wine

This is such an easy balloon wine recipe, and it turns out great!
Click here to see all balloon wine recipes!

Recipe:

3 cans white grape juice concentrate
1 1/2 cups sugar
water
yeast

Using all sanitized equipment and containers, add grape concentrate, sugar, and water to a one gallon container. Cap and shake to dissolve your sugar. Then, add in your wine yeast. Poke a balloon with a pin a few times, and put the balloon over the container.

This generally needs to ferment 10 to 15 days at room temp. Then it needs time to clear. Racking is optional, but might make for less sediment in your bottles.


Tips:

1.) Use a white wine yeast, I had awesome results with K1V-1116
2.) Age the balloon wine in the bottle for about ten months before drinking if you can wait. I did, and it was really worth it.

Monday, December 12, 2011

Red Balloon Wine

This is a simple recipe for 1 gallon of red hillbilly wine.
Click here to see all balloon wine recipes!


Recipe
:

3 cans frozen grape concentrate
1 cup sugar
water
yeast


Sanitize all equipment. Put sugar, grape juice concentrate, and water into one gallon sanitized container. Shake up until sugar is dissolved. Add yeast. Slap on balloon with pinholes. Ferment.

Tips:

1.) Use wine yeast, and a read wine yeast like pasteur red if you can.
2.) Once fermentation is done/almost done, put a new balloon on without pinholes; it keeps more oxygen out.
3.) Make sure the juice doesn't have preservatives, they might kill off the yeast. Welch's grape juice concentrate has worked fine for me in the past.

Fermentation will likely last 10 to 15 days at room temperature. Give the wine longer to clear. Rack if desired, bottle when desired.

Tuesday, December 6, 2011

Balloon Wines

The reason I started the Winemaker's Notebook was to provide a resource for beginner winemakers. When I first started making wine, I had no idea what I was doing, and my google searches led me to sites talking about brix, pH, specific gravity, hydrometers, airlocks, strains of yeast, nutrients, enzymes, tannins, and a whole slew of other things to do with wine making. Even though I could figure what most of these things were, and being in biology many of them were extremely familiar, it wasn't as if I had all of the equipment and ingredients and additives to start right out, and that's what I wanted to do. I wanted to go to the market, buy a few things, and make wine.

It can be done.

In an effort to make this site of even greater value to the beginning winemaker, I am introducing a new section of the site totally dedicated to balloon wines.

What the heck is a balloon wine?

Balloon wine is wine so simple, that the only "special" equipment or ingredient that is necessary to make it is wine yeast, which can be ordered on line for about 50 cents.

Balloon wine is essentially all the ingredients, thrown into a sanitized container, with a balloon slapped on top. It may seem rather rudimentary, but it is indeed the first step that I took in winemaking, and led me to what I do today.

a balloon airlock, left, and a plastic airlock, right

The best part is the extremely low start-up cost. For right around five dollars one can get their juice, their balloons, their yeast, their sugar, and a container. Then, you're on your way to making your first gallon of wine!

Beginning next Monday, and every following Monday for a number of weeks, a balloon wine recipe will appear on the site! Many of the recipes will have an equivalent in the regular recipe section, but you'll notice minor differences in all of them, and major differences in others. All of them will make a decent wine. There will also be a balloon wine section under the "Guides" column on the right hand side of the page, and "Balloon Wine" will be listed under the recipes column. Either of these links will take you to all of the site's balloon wine recipes. Check back often, because as I said, a new recipe will appear each week!

Thursday, December 1, 2011

The search for elder trees


Over the last few days, whenever I'm out walking I've been trying to spot elder trees, but there's a problem. The leaves and berries are all gone, and so I don't have a whole lot to go on.

I've figured out how I missed the leaves falling. I definitely noticed the beautiful foliage this fall, but right outside our front door and living room window seat we have a big ginkgo tree, and each autumn it is the last tree to lose its leaves. Just the other day it shed them.

Anyway, back to the elderberry trees. They've been quite elusive, or so I thought. About a week ago I went on a walk to a specific place where I thought that I had seen some elders, but when I got there I realized they weren't. They looked more like shrubs or weeds. Then a quick google search today made me realize that I was wrong! I had found elderberry trees!

(by the way, the image has nothing to do with elderberries, but I like the way it looked and I forgot to take the camera on my search)

I'm sure this is much more exciting for me than for you, but next summer I will most certainly be bringing you a recipe for elderberry wine!

Monday, November 28, 2011

Banana Wine


The Ramble: Doesn't it sound so tropical? For a long time I knew that people made banana wine, and I had even read some banana wine recipes, but I didn't think I would like it. Then the more I thought about it, the more I needed to try it, and the better it sounded to me. Plus, I got five pounds of bananas for free! One of the coolest things about this recipe is that you chop up the banana skins to get out their natural tannins. They can be used in other wines too, but beware, they may leave a hint of banana on the nose!


Recipe:

4 lbs. peeled, chopped bananas (about 15-20 bananas)
juice of 2 lemons or 2 tsp. citric acid blend
1/4 to 1/2 lb. of chopped banana skins (4-5 skins)
1 gallon water
2 lbs. sugar
1 tsp. yeast nutrient
1/2 tsp pectic enzyme
white wine yeast (used K1V)

Peel bananas, chop bananas and skins, add to stock pot. Add water. Add lemon juice or acid blend. Bring to a boil, then simmer for 30 minutes. Let cool to room temp. This extracts tannins, sugars, flavor, and kills of wild yeasts. Add pectic enzyme, let sit overnight.

Next day, strain out the pulp/skins. Add sugar and nutrient, stirring well to make sure everything is dissolved. Add wine yeast, place in sanitized fermentor with an airlock, and voila!

This wine can take a long time to clear, just be patient. Bottle age for one year, if you can wait.

Enjoy.

Thursday, November 24, 2011

Happy Thanksgiving!


To all U.S. readers of the Winemaker's Notebook, Happy Thanksgiving! Get off the computer, get the cider chilled, get the home-brews chilled, and get the wine up out of the cellar!

Wednesday, November 23, 2011

Belgian Style Wheat Beer

Ramble: This is the first recipe for a beer that I'm posting, and it's an extract recipe that I came up with all on my own. A lot of research on Belgian beers and hops went into the process. Now, don't worry, this site is not being overtaken by home brewing, the Winemaker's Notebook is in fact for winemakers, but I'm sure there are some readers who have lots more experience brewing beer than I do, and for that reason, I'd love for you to share your thoughts down in the comments! Just let me know what you think.


Recipe:


2 lbs. crushed Bavarian white wheat
6 lbs. wheat extract (35%barley, 65% wheat)
1oz. hallertau hops
brewferm blanche yeast
1 lb light brown sugar
1 bitter orange peel (valencia)
1/2 tsp ground coriander


I steeped the crushed grains in a grain bag at 155 degrees Fahrenheit for 60 minutes. Then added the sugar and wheat extract to the mash, brought it to a boil, added in the hops for 60 minutes, and the coriander/orange for the last 5 minutes. Brought to five gallons, added yeast, and fermented!

So far so good, the beer isn't very old yet, and I sampled it for the first time the other day. It definitely needs to age. Up above is what I intended, but I actually only hopped during the boil for about 45 minutes. And, yes, the beer could be a little hoppier, but overall I'm pretty satisfied with both the flavor and aroma. The orange comes through very nicely, a little more than some of the Belgian beers I've sampled in the past, but it's by no means overpowering. It has been a lot of fun making my own extract recipe, and I'm sure that by Christmas time, this will be an excellent beer.

Have a Happy Thanksgiving to all of the American Readers!

Monday, November 21, 2011

Blueberry Wine

Introduction: This is a pretty clear cut, simple, and delicious recipe for a medium-to-full bodied blueberry wine. For a full-bodied wine, try 3 lbs of blueberries per gallon, for a lighter-bodied wine, try 2 lbs. Frozen berries will work. It is the most beautiful wine, too. Unbelievably purple.


Recipe:
2 1/2 lbs blueberries
boiling water to one gallon
2 lbs sugar (about 4 1/2 cups)
1/2 tsp. pectic enzyme
1 tsp. yeast nutrients
wine yeast (used montrachet)


Place blueberries in a stock pot, if frozen, allow to thaw. In another stock pot, boil about 1 gallon of water. Very carefully pour the hot water over the blueberries. This kills of wild yeasts. You can put in your sugar now, as it dissolves easier in hot water.

Let it all reach room temperature, then stir in your pectic enzyme. Let the mixture sit overnight. Add in your yeast nutrients and wine yeast.

After two days strain the must with cheese cloth, a nylon strainer bag, a turkey stuffing bag... whatever food safe device that works for you. Get all that juice out!

Put the juice in the fermentor with an airlock. Rack if/as necessary. Bottle when ready!

Enjoy it, it is delicious!

( photo on left: I had more juice than I could fit in my one gallon primary, so I threw it in a corona bottle with a balloon on top! Whatever it takes!)

The Winemaker

Thursday, November 17, 2011

Random Tips and Ramblings...

That, over there to the left, is a picture of the front hallway into our house. That's the wine and beer that I'm working on right now. Some of it. There's another five gallons of cider in the kitchen, and another half gallon of cranberry wine in the Living room. I think I need a workshop just for this hobby. From front to back, the wines are: cranberry wine, orange wine, blueberry wine, more blueberry wine, four gallons of peach wine, apple cider, and Belgian wheat beer. I swear, I'm not an alcoholic. I can't even remember the last time I had a buzz.


So, I've made a lot of wine, but if you have a bottle with dinner once a week, or a glass after work a few days a week, you'll find that you can run through it faster than you would have thought.

Done rambling.

Tips:
I put together a few tips that have made my life easier, and i thought I ought to share them.


Exploding Bottles:
It does happen. Or even just if your corks pop, it's not fun. It's sad. So, what you see here is my pear cider I recently made. I finished the bottles with labels and PVC caps, but just in case, while it's carbonating over the next few days to weeks, I set them in a bucket, and I'm leaving them there. That way, if anything did happen, then at least the cleanup would be easy.


Sample Bottles: I've started to bottle up a couple tiny bottles with each batch, provided that there is enough, so that after aging a while, I can sample a little bit, without wasting a whole bottle if it wasn't really ready. What you see here is apple cider and pear cider in mini wine bottles. Beer bottles will work too if you have a bottle capping device.


Water Carboys
: I picked this 5-gallon carboy up for about $13 with the deposit. The cost was a little more than an "Ale Pail", but way less than a "better bottle" or a glass carboy. Best of all, you can see through it and know how your wine is progressing, and whether or not it's clear, a major problem that I've had with the opaque buckets. It's also very strong, and they come in three gallon size too, which cost significantly less.


Despite how much wine I've made, I'm constantly discovering new tricks and tools. It makes things fun and interesting.

Until next time,

The Winemaker

Tuesday, November 15, 2011

Pumpkin Ale

I made another beer. A while ago actually. Caity bought a kit for me from Midwest home brewing for my birthday, part grain part extract, for Pumpkin Ale. Just in time for Thanksgiving and Christmas... if it lasts that long.

So, here's the deal with these kits: they're a ton of fun, they have everything but the water, and they're super easy. Also, you don't need a ton of equipment--in fact, if you have what it takes to make a five gallon batch of wine, then you're pretty much set to make a five gallon batch of beer except, I suppose, for bottles, caps, and a capper, all of which are cheap, and bottles can be free if you've got a few friends willing to donate them to a good cause. I think that was a run-on sentence.

Anyway, with these kits, you basically crush up your grains with a rolling pin, put 'em in a boiling bag, and steep them in a few gallons of water for fifty minutes at about 150 degrees, like a big tea bag. Then you add in your malt extract and sugar, and bring it to a boil. Then you add in your hops, and let it keep boiling for about an hour. Then for the last five minutes, you add in some more hops--aroma hops. Then you cool it all down, put it in your bucket, fill it up to five gallons, pitch your yeast, and you're on your way to having beer! It takes more time than some wine... it takes less time than some wines, but what I like is that the payoff is so fast. You can be drinking your homemade beer in a month's time.
This beer is taking a little longer to clear for me, I made it back on October 3, my birthday. I'm making a guess and saying its because of the pumpkin juice having lots of pectin in it, but it tastes grand. A little hoppier than the Irish Red ale that I made not too far back. It's amazing that for less than 50 cents a bottle, you can make much, much, much better beer than you can buy in the store.

If you're a winemaker that appreciates beer, consider giving home brewing a try, the kits are a great way to start!

PS. I also just brewed a Belgian style wheat beer with orange peel and coriander the other day; I put the recipe together myself. I'll post it sometime in the next week or so, and hopefully you home brew buffs can check it out and give me some feedback!

Richard

Monday, November 14, 2011

Where did the winemaker go?


Last week there was a post on Wednesday, and then one on Sunday. So you see, I was around but there was a bit of an unusual schedule. I've been making wine and beer!

Last week I made a five gallon batch of belgian wheat beer with a recipe I put together myself, four gallons of our famous peach wine, and I bottled up some pear wine ( picture to the left, you can tell that I added a few oak chips right to the bottles. I don't know if that's allowed, but I thought it looked fun, so there you have it!). It's been busy.

In the next week I'll be writing about blueberry wine with a recipe, a little bit about our endeavors with brewing beer... and more! Find it all on the Winemaker's Notebook!

Richard

Sunday, November 13, 2011

Orange Wine

Introduction: There are a number of recipes for orange wine out there that give a very sweet end product with spices in it. This is not one of them. This recipe gives a dry, light-bodied orange wine that's more of a refreshing summer or fall drink. It's a good young wine, not requiring a lot of aging before it has good drinkability, about three months. Make sure your oranges are sweet and ripe. Because their sugar content can vary so much, it doesn't hurt to take hydrometer readings. This wine also clears really fast, which is fun! Give it a go!


Recipe:
30-40 ripe oranges
water to one gallon
2lbs (4 1/2 cups) sugar
1 tsp. yeast nutrient
1/8 heaping teaspoon tannins
wine yeast (used EC-1118)

Peel and juice your oranges, keeping as much of the white pith out as possible. We peeled our oranges, pulsed them in the blender, then put them in a cheesecloth/straining bag. This gave a really high juice yield. We used 35 Valencia oranges and less than one quart of water. Less water means a little more body and more fruity-ness.

You can use a campden tablet crushed overnight here to kill off wild yeasts/bacteria. We slowly heated our juice up to 170 degrees for 20 minutes with no adverse effects on the taste; it also helped the sugar go into solution. Add you tannins, yeast nutrient, and wine yeast when back to room temperature.

Attach an airlock, and ferment! It should clear easily, bottle when done fermenting, age a few months to one year, and enjoy!

The winemaker

Wednesday, November 9, 2011

Our First "Wine Tasting"


Two weekends back Caity and I hosted our very first "wine and beer tasting" with a few friends. Okay, actually it was an excuse to try a whole bunch of wines and beer before we all had dinner, but it was fun! We did our white wine, peach wine, mead, Irish red ale, pumpkin spice ale, and a "pear beer" that Cait's dad made. The peach wine and mead came out on top overall, they were the two wine favorites, and everyone liked the Irish red ale better than the pumpkin ale. I attribute that to the fact that it was still very young and a bit yeasty. One friend just couldn't get enough of the pear beer.

It was a lot of fun, but a problem arose, what to do with all the open wine?

Dinner was early, and the night was long, and between us and our friends, we managed to clean up all the wine. And the dishes too.

Seriously though, this was a blast. If you're anything like us, you've got five to ten different homemade wines and brews on hand, and this was a great way to share the fun with friends. They got really into it too, asking all about the process and whatnot.

And they were quite impressed, and I just can't help that I enjoyed that.

Right now we've got Irish red ale, pumpkin ale, a wheat beer, cranberry wine, peach wine, mead, meddyglyn, pumpkin wine, blueberry wine, orange wine, apple cider, and pear cider either bottled or in the fermenters, which might sound like a lot, but it makes amazing (and cheap) gifts, you always have something fun to bring to a gathering, and for those days when you just need a glass of wine after a long day, it's there. Our vast spread of wines did, however, get our friend Hannah to ask, "So, do you just sit around and think to yourself, 'what can I make into wine?' ". Yes, Hannah, I do. Hence, the orange wine (will post the recipe soon!).
I have to admit, I was really nervous about sharing our homemade wines. I know that I like them, but I worry they won't be quite up to par for our guests. I thought wrong. They were having so much fun just trying the stuff I probably could have been serving them grape juice and they wouldn't have known the difference! So, have a bunch of good homemade stuff? Have a wine (or beer) tasting!

Friday, November 4, 2011

All about White...

There's a recipe, over there on the left, called white hillbilly wine. Now, I was a little apprehensive about putting it up in the beginning, because the white wine was only a few months old, and I didn't like it all that much. Cait did though, she thought it was pretty good, and pointed out that I'm not all that inclined to white wines anyway, and so she convinced me to put that post up.

Well, the wine's almost a year old now (or was until we finished it off a few days ago), and between months nine and eleven, something happened, the harshness smoothed out, the bouquet became quite smooth, and it had good mouthfeel. It turned into a top-notch wine, and I plan on making three more gallons to have on hand and to age.

It wasn't just me.

We had a wine-tasting with a couple of friends last weekend, which I'll post about later. They tried the white wine, and our friend Hannah said, and I quote, "This is as good as anything you can buy at the wine shop." I was thrilled.

I didn't even bother telling them that it's actually from Welches' white grape juice concentrate. The white hillbilly wine ultimately came out much, much better than the red, and as it's one of the easiest recipes to make, I would encourage anyone who wants to have some cheap fun to make it, or any starting winemakers. The key is definitely patience. Unfortunately, there is no instantaneous gratification with this recipe, it takes time.

The good news is, it's really easy to make, and it takes no effort whatsoever to set those bottles down in the basement and forget about them for a year. You'll be glad you did!

Wednesday, November 2, 2011

Cranberry Wine

So here's the deal with this one. I'm fermenting it right now. Which means the recipe isn't necessarily tried and true by yours truly. I'm not in the habit of doing this. However, cranberry wine is coming very, very highly recommended from several individuals who are quite expert in the way of making country wines, and this recipe is a middle-of-the-road to those recipes that others have tried and claim to be excellent. Mine is almost done fermenting, and I just had a little taste. It was wonderful. Most wines, when I have tried them while they're still fermenting are disgusting. If this one is good being only 85% fermented, I cannot imagine the flavor a year from now! American and Canadian supermarkets are flooded with cranberries right about now, so make some!


2 lbs. cranberries
boiling water to one gallon.
6 cups sugar
1 tsp. yeast nutrient
1/2 tsp. pectic enzyme
less than 1/8 teaspoons tannin (or just don't worry about it)
wine yeast


Coarsely chop cranberries in food processor. Place in sanitized stock pot. Boil water. Very carefully pour the boiling water over the chopped cranberries. Cover and let sit until the must reaches room temperature. Add in pectic enzyme and stir with sanitized spoon. Let sit overnight.
Next day add in nutrient, sugar, tannins and wine yeast. For yeast I used K1V, but I've heard that red wine yeasts also do a really nice job. Make sure everything is dissolved well. Let sit for 1-3 days covered.

Strain the must with cheesecloth, a beer boiling bag, or a turkey stuffing bag into your fermenter. (I doubled up two turkey stuffing bags and it worked marvelously.) Cover with lid, attach airlock, and allow to ferment! Rack as necessary, bottle still (not a bubbly wine or cider!).

Enjoy.

I can't wait for this to age... I am really excited about this recipe, and made 1 and 1/2 gallons.

Get to it!

Monday, October 31, 2011

Step by Step: How do you make wine?

I realized the other day that though I've been trying to run a site on simple winemaking recipes and techniques, I never have posted a simple explanatory guide on how it is that wine is made. Thus this very generic guide on making wine at home will be forever placed on the right hand side of the page in the "Guides" section, where you can also find the glossary I have been putting together, and which I add to on occasion, and the sugar guide from a post in early October of this year. This post will include all of the must-knows before you begin the most basic winemaking, without overwhelming you with details. It's an easy hobby, and only ever has to be as complex as you want to make it! Give it a try!

Let's break winemaking down into steps.

Step one: Sanitize your space, your utensils, and the container that all of your ingredients are going into.

Step two: Put your juice and any other ingredients like sugar, water... into the container.

Step three: Put in your yeast (the temperature of the juice must be between 65 and 80 degrees Fahrenheit for most yeasts to do their work).


Step four: Cover the container so that air can get out, but not in. How? They make special airlocks for this, but a balloon with some pinholes poked in it usually works just fine.

Step five: Wait (It might take eight days, it might take forty. This depends on your yeast, the temperature, the amount of sugar in the juice... all sorts of things. Just wait until the yeast stops working, and the wine isn't as cloudy.).

Step six: Bottle your wine, keeping as much yeast out as possible. If there is a lot of yeast floating around in the wine, then its probably not ready to bottle.

Step seven: Put the bottles somewhere cool to age for a while. Aging will depend on what you want out of your wine, and what kind of wine it is.

Note on Aging: My peach wine is great at ten months old, my light mead is good at two months, my pumpkin wine takes over a year to develop its smooth vanilla taste. You can drink the white hillbilly wine after a month, and it tastes like a two dollar bottle of wine, or you can drink it at ten months old, and its about as good as anything you can buy at the wine shop for ten dollars.


Rules: If you follow these basic rules, then you're bound to have something that, given time, tastes pretty good:

1.) Cleanliness, you must make sure everything you do is sanitary, especially that you ferment your wine in a sanitary container

2.) Do not use juices or concentrates with preservatives, these often kill your yeast, make it difficult to ferment, or cause your yeast to produce off-flavors or odors.

3.) Use wine yeast only.

4.)Patience! If it doesn't taste good, don't drink it, and don't throw it away. I once dumped out five bottles of wine because I didn't like it. Ten months later I still had two bottles and it was amazing!

Friday, October 28, 2011

All About Peach...

Last February I shared my recipe for peach wine. I had had the wine for a while, and it was pretty good, definitely worth making again (which I have), but then Cait and I went a while without having any. A few months, and it underwent a transformation. A really, really wonderful transformation.

When we opened our third-to-last bottle of our 2010 Peach in early October, it was very dry, fruity yet woody, complex. There are ways in which I would liken it to a nice dry Rioja. Now we have no bottles left.

The recipe is really quite simple, and if you'd like to make a cheaper version or if you simply can't get raisins and lemons in time, then you can always substitute a little acid blend and a tiny bit of grape tannins (less than 1/8 tsp). Of course if you are using fresh peaches, slice them up and boil your water, then pour it over them to kill off the wild yeasts, or use a campden tablet crushed. If you recall from the original post, I use my mom's home canned peaches, and it could not have turned out any better.

I am visiting my parents this weekend, and raiding their peaches.

I must warn you about something if you plan to make this recipe. After two months the wine still is too woody, it's drinkable, but almost a little disappointing. After four months, it might be hard to save any. If you make it to six months, you're half way there. On its first birthday, this wine is good for any occasion. Give it as a gift (if you can stand to part with it), bring it to a get-together.

You must try this recipe!

The Winemaker

Monday, October 24, 2011

Pear Cider

Ramble: This recipe for pear cider or pear wine is simple and delicious. At our farmers market right now pears are going for $2.50 for 8 quarts! That's almost enough for two gallons of this delicious beverage!


Recipe:

4 lbs. Pears peeled and sliced
boiling water to 1 gallon
6 cups sugar
1/8 tsp. tannins
1/2 tsp. pectic enzyme
1tsp yeast nutrient
champagne or wine yeast


Peel and slice the pears into small chunks. Place in a sanitized stock pot. In another pot, bring your water to a rapid boil. Carefully pour the water over the chopped pears, place lid over them, and allow them to sit until the entire mixture reaches room temperature, or at least under 100 degrees Fahrenheit (about 38 centigrade). Add the pectic enzyme and stir about to mix it in.

Let sit overnight. The following day the pectic enzyme will have made your pears quite mushy, use a very well-washed hand or better yet a sanitized potato masher to squish the pears even more. Give the mixture time to sit and let the pear juice work its way out of the fruit. This can be anywhere from a few hours to overnight. More time generally means more pear flavor.

After having sat a while, use a cheesecloth (two layers is best) or a few turkey stuffing bags, or beer boiling bags to strain the juice from the pears. Do not squeeze the juice out if you can help it, just let it sit!

Add in all other ingredients, making sure that the sugar, tannins, and yeast nutrient are dissolved, and place the entire mixture into your sanitized fermenter, with an airlock attached. All for fermentation, and bottle when clear!

Tips:
How to make it bubbly: I know I like my pear cider bubbly, so here's how it goes: If you're filling a beer bottle/small bottles: add 1 tsp sugar to each bottle before filling. If using wine bottles add 1 1/2 tsp. sugar to the bottle before filling. Store at room temperature for a few weeks to get carbonation, and keep the bottles in a Rubbermaid bin or leak-proof container if possible. If you have added too much sugar your corks could pop or your bottles could explode. This has only ever happened to me once, a long time ago, when I added way way too much sugar when bottling. With these proportions I have never had a problem! Also, good synthetic number 9 corks stay wedged in the best!

Related Recipes: meddyglyn, light mead, medium mead, sweet mead, apple cider

Lakewood Winery, Seneca Lake, NY


In early September Cait and I visited my parents in North-central Pennsylvania, and took my mom to Watkins Glen, NY to do a day hike up the gorge. Things took a turn, it was very hot out, and we ended up doing a few wine tastings at some of the Vineyards/Wineries along Seneca Lake. The best of the batch was, by far, Lakewood Vineyards.

Lakewood is just a few miles up from the southern tip of Seneca Lake, in the Finger Lakes region of New York State. The winery is on the west side of the lake. The atmosphere was casual, the staff was a riot, and the place was bustling, and it's no wonder, they have some really wonderful wines.

As you know, I am a dry red wine fan, but I tasted a bit of everything. My favorites were by far the Gewurztraminer, their Long Stem White, and Candeo, a sparkling wine that they claim is for those moments when "beer is too little, and wine is too much". I know, these are all white wines, but that's where the Finger Lakes wineries excel. We bought a few bottles and have since enjoyed them.

Wines are not all that Lakewood makes, they also have a few meads on hand. I am happy to report this, as I know that my mead and meddyglyn recipes are among the most popular on the site.

Lakewood makes a mead called Seifu's Tej, an Ethiopian style mead that they brew for a chain of popular west-coast Ethiopian restaurants under the guidance of a master Tej blender. It is an exceptional mead, light, crisp, with a hint of sweetness and very refreshing. They also make their "Mystic Mead" which is a blend of wildflower and orange blossom honeys. Though I did not sample it on this trip, I look forward to trying it in the future.

We will certainly be returning to Lakewood. A link to their website can be found here: Lakewood Vineyards.

Saturday, October 22, 2011

Next Week in the Winemaker's Notebook:


Next week in the Winemaker's Notebook I have a fun mix of recipes, wine-related recommendations / anecdotes / tips, and an update all about a favorite recipe!

My first post will feature a trip to Lakewood Winery, in the Finger Lake's region of upstate New York, where grapes are not the only thing they're fermenting! I'll talk about a style of mead that was new to me, and definitely new to New York!

The next post will feature a recipe for Pear Cider! Don't let the word cider fool you, this recipe packs a little more punch than your grocery-store variety ciders, and a delicious punch at that! Check in, and make for yourself one of the favorite drinks of the ancient Romans!

The last post of the week will be all about peach! Our peach wine recipe is top notch, but there are a few considerations you may want to know about before you make it. I'll include a few new tips, and some variations to the original recipe posted! Make some now while you can still get peaches, or do as I do, and use home-canned peaches any time of the year!

Until next time,

The Winemaker

Friday, October 21, 2011

Sweet Mead

Ramble: This mead recipe is similar to the others that i have posted, but it is probably the only one that will give you a sweet mead. It's simple, quick, and delicious every time. It produces a darker mead, and a very strong mead, so watch out!


Recipe:
5lbs honey
water to one gallon
1/4 tsp. tannins
1 tsp. yeast nutrient
wine yeast (I recommend pasteur champagne)


Combine honey and water in a large pot. Stir to dissolve the honey, and bring to a boil. When it begins to boil, a foam will come to the top of the liquid, skim this off and discard it. (This saves having to do very frequent racking, as without this step your mead will naturally produce sediment over time). This step also kills wild yeasts in your honey, so that no sulfur compounds are needed to kill them off! Allow the liquid to cool to at least 80 degrees Fahrenheit while covered, then add in the tannins, yeast nutrient, and yeast. Place in fermentor, fit with a cover and an airlock, and you're on your way to a dark, strong, sweet mead!


Tips: For an easy way to get your tannins into the must (the juice you're fermenting) see Tannin Tip , and for more information on mead, some helpful tips, and some fun variations, visit my medium mead page: Mead Tips.

Related Recipes: meddyglyn, light mead, medium mead, apple cider, pear cider

Wednesday, October 19, 2011

Sugars


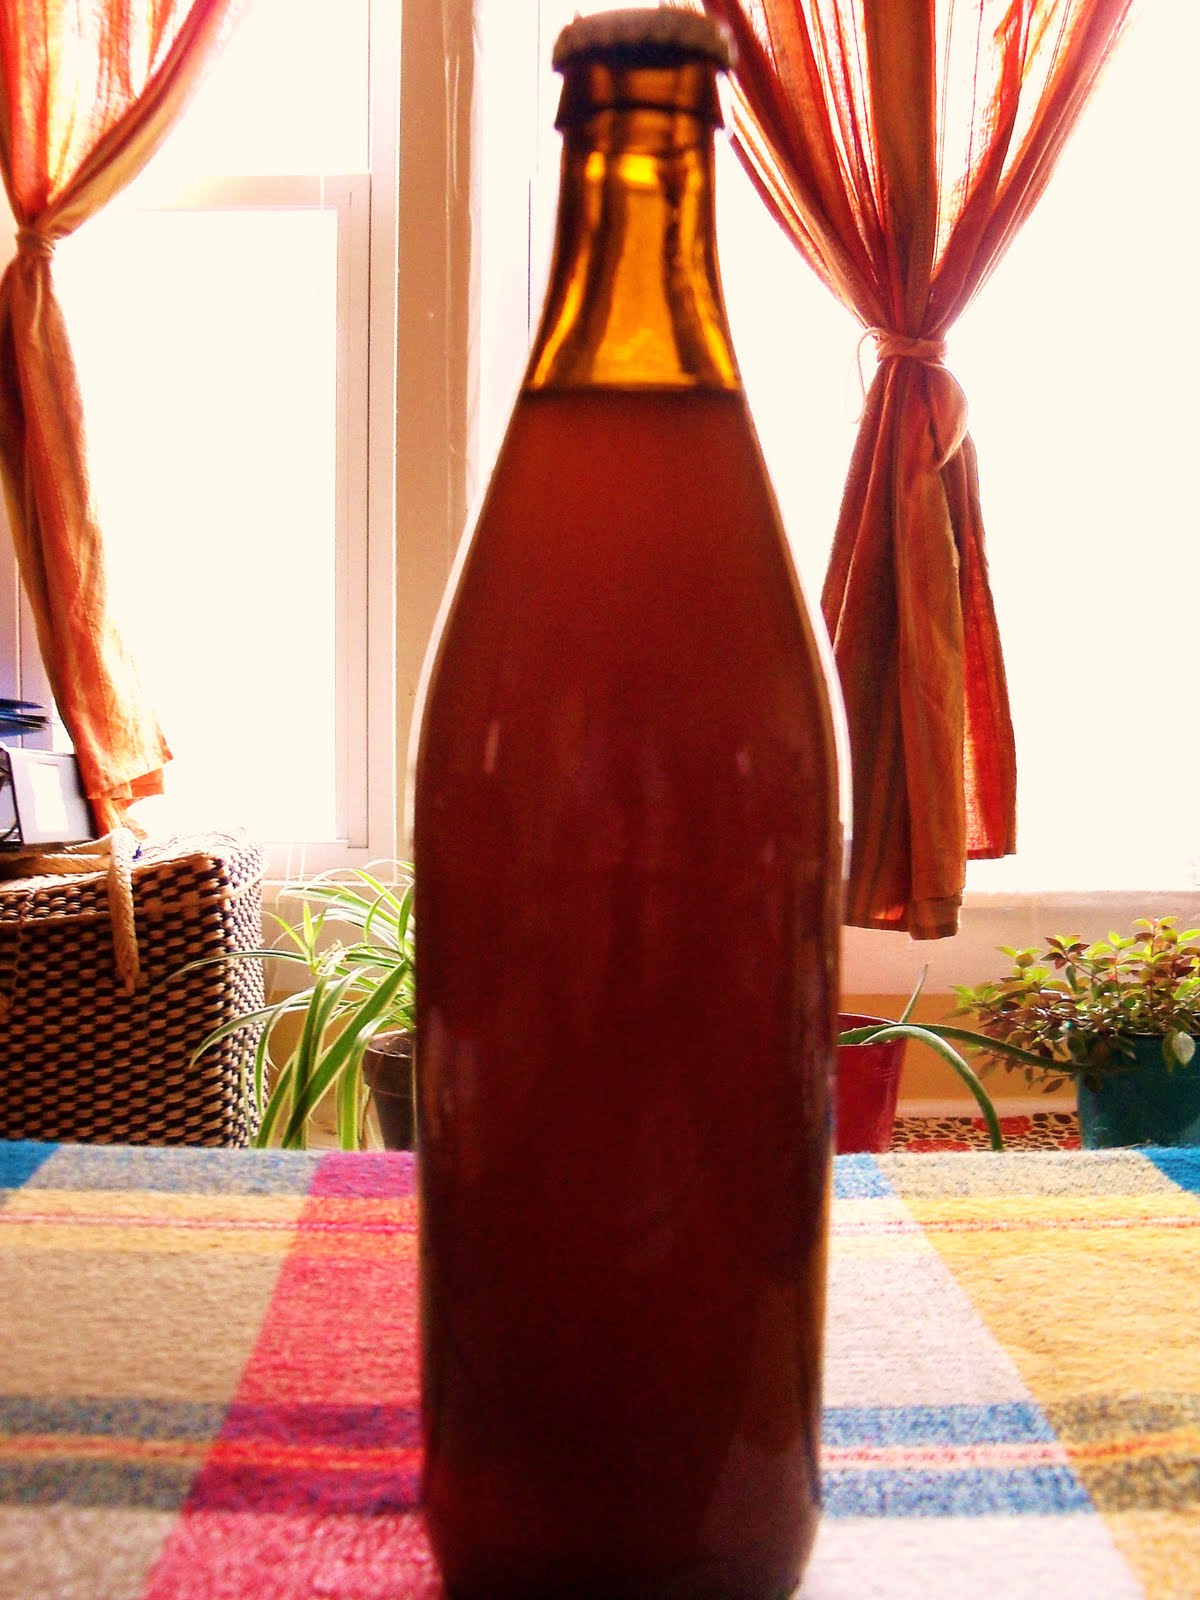
Most of the recipes on this site to date are for country wines, a very broad term that generally refers to wines made with anything other than grapes. Every fruit is different, but generally speaking, most fruits do not have the sugar content, the acidity, or the woody qualities that grapes have, and that's why we end up adding things to our country wines like sugars, tea, raisins, lemon juice, acid blend, tannins, and yeast nutrients. This certainly doesn't make these wines any less "pure" than a straight recipe of pressed grapes and yeast (in reality there are very, very few wineries that add nothing to their juices to get the perfect chemical mix).

I personally avoid using stabilizers (other than citric acid, the "lemon juice" acid) and preservatives like campden or other sulfur compounds in my wines, but that's just my choice, and I wouldn't scoff at anyone who does use them. The rest of these "additives", however, are sometimes not optional, not if you want a full-bodied, great-tasting wine.

Today, we focus on sugars.

There is a whole slew of sugars out there that can be used in your wine, and knowing what to use is not easy for a beginner. So hopefully this helps to answer, What kind of sugar should I use in my wine?. Let's do this by sugar:

Corn sugar: This is a fermentable sugar most often used to prime beer before bottling. It's generally comes ground ultra fine so that it goes into solution easily. It can also be used to raise the alcohol of a wine or beer without altering the flavor. It is a very refined sugar.

Table sugar: This is sucrose, which yeast will ferment. It is by far the cheapest sugar for making wine, and can also be added to your wine or beer to boost the alcohol content without altering the taste.

Brown sugar: Brown sugar will, of course, also boost your alcohol content, but it will also change the taste of your wine. During fermentation and aging the brown sugar (which has some of the molasses left on it, as it is less refined than table sugar) imparts caramel aromas and flavors to the wine. Thus, you wouldn't want to use this with peach wine or a grape wine, but it makes for a very warming and cheery apple cider, and can even add nice complexities to a mead or beer.

Molasses: Molasses should probably be avoided. It will greatly affect the taste of your wine, and often not for the better. While it may bring some notes of caramel out, molasses is full of impurities from refining table sugar, and those impurities can lead to off odors and flavors in your wine.

Honey: If you've tried mead, you know the flavor that fermented honey imparts, and it can be very nice and refreshing, but it is a flavor all its own. Honey compliments many beers and fruits, and when used with fruit juice, a wine called melomel.

Malt extract: This is dried malt extract, and is often used in beers, but can on occasion add a grainy base to fruit wines if desired. Its use as such is not especially common.

Turbinado sugar: This is a washed brown sugar, leaving a little molasses, but not much. It imparts nice caramel hints, without overpowering the flavor of your wine, an excellent choice for sugar.

This list is by no means extensive, but it should be more than enough information to get the beginner or intermediate home wine-maker an idea of what kind of sugars to use in their country wines. Until next time...

The Winemaker

Monday, October 17, 2011

Easy Apple Cider


This recipe does vary from my first recipe that I posted. It is not a lot different, but it is very simple, and delicious. I've made many apple ciders over the last year, and this one is really fool-proof, so give it a whirl.

Recipe:
1 gallon fresh-pressed apple cider
1 1/2 cups sugar
1/4 tsp tannins
champagne yeast

That's all! You can mix it all together in your sanitized fermenter (with juice at room temp) and let it go! That's all you need to do! It tastes just wonderful. Remember: the better the quality of your juice, the better the cider will come out, but also remember that it's pretty hard to mess up hard cider. If you use good yeast and good juice, you'll get a consistently good cider!


Tips:

Pectic Enzyme: I use this stuff every time. It breaks down the pectin in your apple cider/wine that makes it hazy. Without using it, your cider will probably take a very long time to clear. You also run the risk that it will never clear. Cider with a pectin haze tastes just as good, it's just not quite as pretty. Use it at a rate of 1 tsp. per gallon, and let it sit in your cider overnight before adding any other ingredients.

Yeast: Although pasteur champagne is not actually a champagne yeast, it makes a wonderful, nutty cider. Another amazing cider yeast is CĂ´tes des Blancs, which gives a nice fruity flavor and aroma to your cider.

Tannins: To maximize the potential of your tannins, follow the following link for an easy method for getting tannins into your cider: Tannin Tip.

Oaking chips: Oak barrels can add an amazing, complex character to your apple cider, unfortunately they cost a small fortune. An affordable alternative is oaking chips, these are toasted French or American oak that can be bought in small quantities very cheaply (about one dollar per ounce usually). An ounce or three-quarters of an ounce are easily enough to oak one gallon of cider, and three ounces, given enough time (seven months give or take a few) will be enough to oak about five gallons.

At present I am fermenting ten gallons of apple cider. Half of it i will Oak for eight months, and half of it I will bottle and we will enjoy throughout this winter and next spring or even next summer depending on how long it lasts. I know that nine months or a year is a long time to wait for your cider or wine or mead, which is why I try to make a big enough batch that I can sample a bottle every few months, AND have some left once it has "come of age". This is also a great way to come to realize just how much your wine changes between bottling and its first birthday. It is really a lot of fun. So, quick, before autumn is over, get out there and make some apple cider!

Related Recipes: meddyglyn, light mead, medium mead, sweet mead, pear cider

Saturday, October 15, 2011

Irish Red Ale: A Change of Pace for the Winemaker


I love wine, that surely goes without saying, but I also enjoy a good beer. My girlfriend's father has been brewing beer for a little over a year now, and he's met with great success. His ales and stouts and cervezas have been wonderful, and he now almost exclusively provides beer for family gatherings and as a parting gift each time we visit. It's enough to tempt the winemaker to try his hand at beer.

And that's exactly what happened. I had been tossing the idea around for some time when groupon in our area was an all-you-need beer kit (that's a daily deal website with deep discounts on--usually--local goods). I selected the Irish red ale as my beer to brew, and soon I was on my way! You can see the finished product here; it was so unfortunate, in order to take the picture I had to pour this glass and sip it while writing this post!

The kit contained yeast, priming sugar, liquid malt extract, a pound of grains, aroma hops, and bittering hops. All in all I spent a good amount of time sanitizing, and then about three hours brewing. I let the beer sit for a while after fermenting to clear, then racked it, added the priming sugar, and bottled it. Altogether a very simple experience, and very rewarding. The older the beer gets, the better it tastes, but to someone who is used to waiting months before tasting wine, beer is a nearly instantaneous reward!

I'm on my second batch of beer right now, but that's not all I've been up to!

Thursday, October 13, 2011

Meddyglyn

Meddyglyn or metheglin is a type of mead of Welsh origin. It takes your basic mead and adds any number of various herbs and spices to produce a cheery drink that goes down smooth. It can definitely be enjoyed any time of the year, but makes an especially nice holiday drink. The amount of honey in the recipe can be 2.2 lbs per gallon; 3 lbs per gallon, or 5 lbs per gallon for a sweeter meddyglyn. This corresponds to the "light mead" and "medium mead" recipes on the site already, and the 5 lb corresponds to a strong, sweet mead.


Honey
Water to one gallon
1 tsp. yeast nutrient
1/4 Tsp. tannins
orange peel
1 cinnamon stick
1/4 tsp. whole or course ground nutmeg
2 cloves
1/4 vanilla bean


Add honey and water to a pot. Heat over low heat until the honey is dissolved. Then bring to a swift boil. Foam will come to the top. Scoop off as much of the foam as possible (this keeps sediment out of the bottles later on). Cool the mixture to about 70 to 80 degrees Fahrenheit. Add in nutrient and tannins. Place the mixture into the primary fermenter, add the yeast.

After about two weeks or when the fermentation seems to stop, rack to secondary fermenter if you're using one, if not go the the next step.

Boil a small saucepan of water. Cut the orange peel up into slices, and boil for five minutes. This gets rid of bitterness. If you have any concerns about bacteria on the vanilla bean or cinnamon stick, you can also boil these for a few minutes with the orange peel. Remove from water with tongs, and add directly to the fermenter. Also add in the other spices. Allow to steep in the mead, which is now becoming meddyglyn. I let mine sit for ten days to two weeks before removing the cinnamon and orange peel, but you can play with this. The longer it sits, the more pronounced the flavor of the spices.

Bottle and enjoy!

Note: Any of the spices can be optional, but I would NOT skip the orange peel, the cinnamon stick, or the nutmeg, but that's my personal taste. This is an awesome recipe to play around with.

Related Recipes: light mead, medium mead, sweet mead, apple cider, pear cider

Tuesday, October 11, 2011

Light Mead

Ramble: This incredibly simple recipe is for a very nice, light, dry mead. I've recently made a batch, and it came out wonderfully! It is truly spectacular, I like it much better than the medium mead, which I also like a lot! It has a very refreshing taste that would make it a perfect summer drink, and the one that i made has a nutty finish and a bit of warming quality that simultaneously make it an ideal fall or winter drink, a quality I often find that adding the tannins brings out. Here goes:


Recipe:

about 2.2 lbs. wildflower honey
1/4 tsp. tannins
1 tsp. yeast nutrient
wine yeast (recommending red star pasteur champagne or lalvin K1-V1116, or red star cĂ´tes des blancs)


Add honey to a stockpot, bring to 1 gallon with water. Warm over low heat until all honey is dissolved. Bring to a swift boil. This will bring a foam to the top of the mixture, scoop off as much of this foam as possible. This step helps your mead to clear very nicely, but also to ensure that sediment doesn't form over time on the bottom of your bottled mead, as happens without this step. If you would rather skip the boiling step, that's an option, and no harm is done.

Allow the mixture to come down to 80 degrees Fahrenheit (about 26 degrees Celsius), but not below sixty degrees. Add in your yeast nutrient (I wouldn't recommend skipping this step if you can avoid it, because honey does not supply a lot of the nutrients that the yeast require, and as we all know, happy yeast make happy wine). Add in your tannins (for a nifty trick to get your tannins into the must better, check out the post "Tannin Tip"). Rack to primary fermenter, then add your yeast. Personally, i used pasteur champagne, which is not actually a champagne base yeast, and it was wonderful. Though it is not a champagne yeast, I like some carbonation in my mead, and this did the trick beautifully. Apply airlock and allow to ferment.

Tips:
Fermentation will likely last at least ten days, but give plenty of time, especially if fermenting below 70 degrees Fahrenheit. Bottle and cork for a flat mead!

For a sparkling mead (which I prefer), add about one and a half teaspoons of sugar to each 750mL bottle before filling, then fill and cork! I would store these in a bucket or bin with a lid on top until certain that all carbonation has ceased. Though I only ever had a problem once with corks popping (when i first started making wine and added way too much sugar to some apple cider), it is better to be safe than sorry and a bucket or bin makes for easy clean up! With this amount of sugar (1.5 tsp.) I have never had a problem! Enjoy!

Related Recipes: meddyglyn, medium mead, sweet mead, apple cider, pear cider

Sunday, October 9, 2011

Tannin Tip


Having tannins on hand can be extremely beneficial. I avoided them when I first started making wine because I didn't like the idea of adding anything "unnatural" to my wine. Instead I tried using black tea and raisins in the must to get what seemed like "more natural" tannins. Then I tried using some tannin powder, and what a difference! I have been very happy with the results, so I would recommend that any winemaker give them a try.

One problem I noticed the first time I used the tannins is that they like to stick together. A week after I put them into a one gallon batch of wine that I had in a clear fermenter, I noticed they were all in a little glommed up bunch on the bottom! So here's my tip for adding tannins to your wine:

Measure out your tannins into a cup first, add a little bit of water to suspend them, and stir like crazy! You'll have to be very careful that they don't sneak onto the back of the spoon and stick there, they like to do that. They're sneaky.

Once you've got it all mixed up, then add it to your mead, cider, hillbilly wine, peach wine, pear wine, meddyglyn, or whatever else you fancy. It's an easy way to maximize the potential of the tannins.

Until next time...

The Winemaker

Thursday, September 8, 2011

Summer Hiatus Is Over!


I have not been writing for a while, for quite a long while, and I feel an explanation is merited. A number of things have played a roll in my absence: primarily, it was summer. Summer is hot, and wine fermented at eighty-five degrees just isn't the same as those cool, rich fall brews. (Though believe me, I am back in full swing now!) So, I have not made much wine over the summer. Reason two: it was summer, and I didn't feel like writing. I know, it sounds like I was lazy, but no, really quite the opposite, I was too busy! Reason three: I went on vacation. Yes, just recently I returned from Costa Rica, where I tried Vino de Mora (a blackberry wine that is reminiscent of dimetapp), trekked through the jungle, swam in coral reefs... all that good stuff. But things are quickly getting back to the grind, and the wine has been flowing!

Here's a quick review of the summer's winemaking activities: In May I made two and a half more gallons of Peach wine, which last night was sampled to my delight. In June I played around a bit and picked up some Motts unfiltered all natural apple juice, just for fun. It seems like apple cider is difficult to mess up, because it turned out wonderfully. I used lavlin K1V 1116 to ferment it. What a pleasant surprise! It quickly disappeared. Then, to my shame, I was shopping at Wal Mart one evening. And I did something even more shameful than shopping at Wal Mart: I grabbed a few cans of their store-brand frozen, concentrated apple juice. Hold the stones, please! Then I fermented it, thinking that surely, apple cider can be messed up. Knowing full well that this was a set up for failure, I did throw in some yeast nutrient, some tannins, and a tiny bit of citric acid.

Two days ago I bottled my peach wine. I bottled two gallons of pumpkin wine. I bottled the shameful apple cider. And though it's only a few months old, I actually think it's enjoyable.

Don't be angry, I am atoning for this erratic summer behavior. I just began fermenting, today, a nice, local, New-York State wildflower-honey mead, light, should be dry, with an alcohol content of about 10%. See, I am back in the swing of things.

I'll post about this later, but you also ought to know that I'm branching out a bit: I've got five gallons of an Irish Red Ale brewing as I write! It smells wonderful, like bakeries! I'm very excited to be brewing some beer. I think that in November, or perhaps even October I'll do a wheat beer.

I'm also going to begin a batch of proper apple cider from proper fresh pressed apples in the next ten to twelve days.

Yes the winemaker is back, and he is writing in his notebook...

Friday, March 18, 2011

The Bargain Bin


At one of the local wine shops there's a bargain bin. I think I've mentioned it before. Now, the words bargain and wine can be very scary together. But for me, it's just as scary to buy a thirty-five dollar bottle of wine that you've never tasted before because--to be honest--your chances of buying vinegar and feet are often just as good in the fine wine section as they are at the bargain bin.

Anyway, there are two bargain bins, the $3.99 bin, and the $5.99 bin. I've had good experiences and bad experiences with the $3.99 bin, and same for the other. But once in a while--and this is the really great part--I'll have an AMAZING experience with the bargain bin, usually the $5.99 bin (they rotate a greater variety in and out here). The two bottles in the picture (empty... oops) are two of my best experiences to date. The Volteo is a really great, citrus-y Spanish Tempranillo-Shiraz blend, aged in French and American oak. Often retails around $13-$20 a bottle in other wine shops, all for just $5.99. Unfortunately, when I went to the wine shop the other night, it was all gone.

The other bottle is an Italian wine from the Sicilian appellation, and I really enjoyed it. It's not an especially expensive wine to begin with, about $10 a bottle, but it is a very nice wine. I haven't got much experience with Italian wines, but this has left me with a very nice impression.

So there it is, wine: good, cheap, and fun. That's how I like it. So next time you happen to be at your local wine shop, don't be pressured to go to the higher shelves, live a little, try a few new wines. It's a lot of fun.